
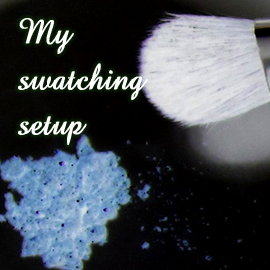
Oh my god - it's full of glitter!!
How I swatch my stuff
Posted on Sunday, at • 3511 views
I’ve seen people who do swatches by dragging their finger through the product in question, and then dragging the product-laden finger down their arm. This can get a lot of product on the arm, but…it also might not be representative of how the product applies to the face. (I know that some people do apply makeup with their fingers, but even those that do probably aren’t as forceful as some of the fingerdrags that I’ve seen done.) When you’re comparing product swatches, you need to know how they were done so that you can best judge how the color will actually look on you. Scroll down a little to see how I swatch things. (I promise, I don’t use colored lights!)
Photography
Setup and Equipment
I take all photographs in a 10x10 room with white walls, a small window that is covered with a heavy curtain, a counter, a large mirror, and six light bulbs in a lighting strip above the mirror. (Yep, it's a bathroom.) The light bulbs are 40-watt LED day bulbs, and they have no filter or colored film over them or between them and the thing being photographed. The counter where I take my photographs is cream-white formica. When photographing lipsticks, liner pencils, brushes, or any other product that needs to lay flat, I put down a piece of white paper.
I've used the same camera since 2012: a 12.1 megapixel Canon PowerShot SD1300 IS. I have cameras on my phone and my tablet, but this one gives me the best-quality images. I don't use a tripod, but I do brace my arm or elbow or shoulder against a wall or chair-back to minimize movement. (The camera supposedly has something that will automatically adjust for shaky hands, but I want clean clear macro shots, and for those, shaky-hands autoadjustment won't work.) I generally take 5-10 shots of a thing, so that I can choose the best one when I'm creating the graphics for my site.
Editing (because yes, that happens) and Sizing
Once I've chosen which photos to use, I always crop the photos and reduce the size. Then they're put into a template that includes the site name, a watermark, and gradient-fade bars at top and bottom for the image labels.
The nail polish photos are the ones that tend to need the most editing. Sometimes I need to rotate the images slightly, to make sure that they're squarely oriented within the template. I sometimes use Photoshop to clean up my cuticles, including torn skin or polish that got onto my cuticles. Rarely, but still occasionally (less than 3% of the time, usually to the nail polish photos,) I apply the Sharpen filter. Even less frequently, I'll adjust the light-and-dark levels when I have a photo that's a little bit washed out.
Swatch Prep and Photography
Eyeshadows
I photograph the product in the pot/pan, with no sifter or covering. Then I put a dry swatch on my arm over primer using the elf Essential Smudge Brush, and a wet (water) swatch on bare skin using either the Crown Chisel Fluff or the elf Essential Eyeshadow Brush. I had great grand plans to include a photo of each eyeshadow on my lid, similar to how some indie companies showcase their colors; and some day I may go back and do that. But that takes a lot of time, and since I had a LOT of products to swatch and photograph, this particular sub-project got moved to the end of the queue.
Eyeliners, Lipsticks and Any Cream Product in Pencil/Stick form
I take a close-up photograph of the product in the barrel. Then I draw a square on my arm, and photograph that. Then apply the product as it's intended to be used (or, in the case of things like the Bite Beauty multisticks, one of the ways that it's intended to be used) and photograph that. When creating the "pro" photos, if a professional picture of the product wasn't available on the vendor site, I would use Image Variations to get a close approximation of the product color for that image only (fewer than 1% of all "vendor" product images on the site.)
Mascaras
I curl and comb my bare lashes, apply one coat of mascara, wait, comb my lashes again, apply a second coat of mascara. Then I photograph my eyes face-on to show how the mascara will appear to most people, and from beneath to better show close-up detail of the finished application. I do not curl my lashes after applying any mascara - not for photographs, nor in my regular routine.
Powder Blushes and Highlighters
I photograph the product in the pot/pan, with no sifter or covering. Then I put a dry swatch on my arm over primer using the Crown Studio Oval Foundation Brush (or any other wide, flat brush.) Blush and highlighter swatches are heavier than regular application so that people get a better idea of the product color and finish, but they're not applied so heavily that they could be mistaken for eyeshadow swatches. I also apply the product as it's intended to be used, and photograph that.
Nail Polishes
These are a little more straightforward: I don't "swatch" them, I do a full manicure. Then I take three photographs: close-view of three nails, polish bottle in the hand, and nails in a fist. For multichrome polishes, I'll use a lightbox to diffuse the light, which actually makes the multichrome effects capturable on camera.
Comments
Categories
We're Everywhere
Disclaimers and Such
 Sparklecrack Central is my personal site. I buy all the items myself. I do not receive any compensation for the posts I make. I also don't post "guest content." All makeup company names, kit names, and color names are trademarks of their respective owners. All original site content, including photos, is free for non-commercial re-use with attribution (further details).
Site Information
Copyright © 2024 Sparklecrack Central - Some Rights Reserved
Responsive design that actually works in IE8. Yes, really. (...get a real browser...)